Graveyard Keeper 2 Zombie Workers — How to Unlock and Automate Workstations
Published 2026-09-237 min read
How to get zombie workers in Graveyard Keeper 2: free zombies from the Dreamdust questline, the Zombie Supply Post, tool proficiency rules, and how to grow an undead workforce with resurrection.
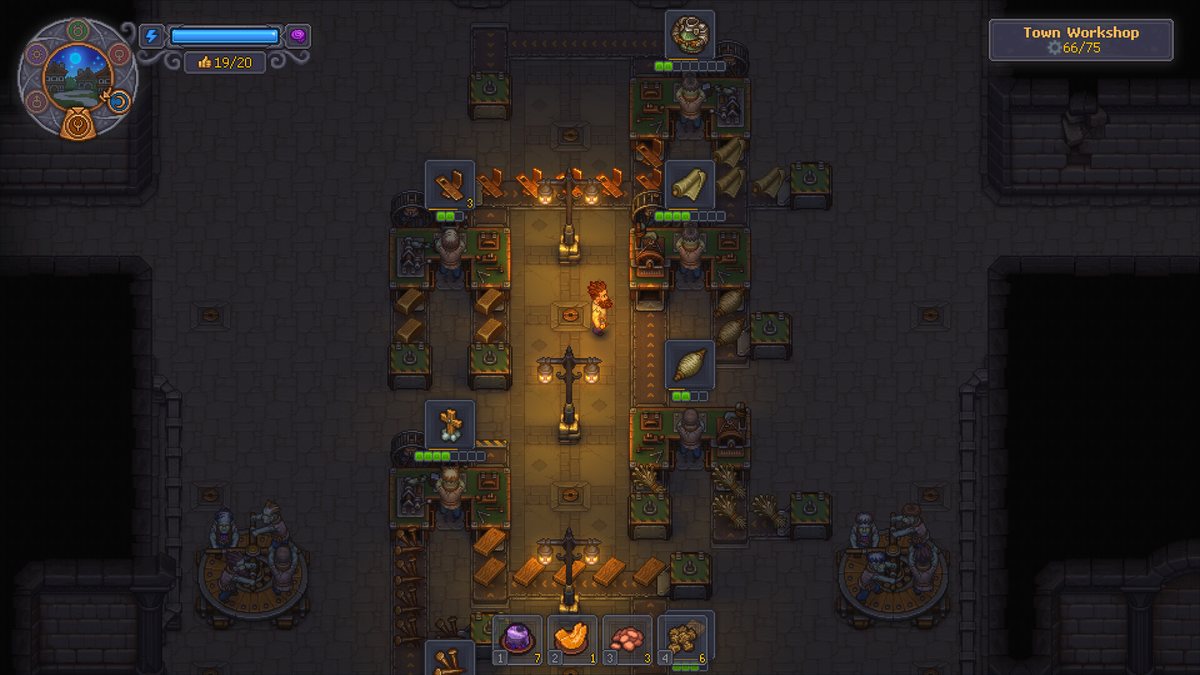
Zombies in Graveyard Keeper 2 are not just bodies waiting for a burial. Unlocked and equipped correctly, they become permanent staff that chop trees, haul materials, craft items and run workstations while you handle everything else. This guide covers every step: your first two free zombies, the supply post, the tool rules that make them actually work, and how to grow the workforce later.
Quick answer
Finish the Dreamdust questline to receive two free zombies, build a Zombie Supply Post, then give each zombie one tool that grants at least 1 point of work proficiency — it will now operate the matching workstation on its own.
Your first two zombies come from the Dreamdust questline
The first two zombies are free, given by the Plague Doctor during the Dreamdust story chain. The route runs from a hidden cellar hatch inside your house, down into a small dungeon, and back up to the Astrologer's Tower:
- In the room at the back of your house, enter the previously locked cellar hatch into the basement. Treat the area as a mini-dungeon: clear the rubble blocking the path and rescue the trapped Plague Doctor.
- Rescuing him unlocks the Astrologer's Tower above your base. At its entrance, use the Inquisitor's badge plus the combination item from your inventory to open the door.
- Use the research table to study water and blood, revealing the required items. Then go to the lab workbench and combine water and blood to craft Dreamdust.
- Hand the Dreamdust to the Plague Doctor. He leads you to his laboratory and gifts you your first two zombies, no charge.
If the Plague Doctor is still locked for you, our Plague Doctor unlock guide walks through every prerequisite, including the friendship stat that blocks most players.
Build the Zombie Supply Post
Before you can assign zombies anywhere, craft the Zombie Supply Post at your workbench:
- 4x Wooden plank
- 4x Bronze nail
Once it stands, you can pick a zombie up onto your shoulder, carry it, and drop it next to a workstation to put it on the clock.
Equip tools — proficiency is everything
A fresh zombie has zero work proficiency, and at zero it just stands beside the station doing nothing. Tools grant proficiency, but the tool must match the station: hand a zombie a hammer and it will never run the sawmill, no matter what.
| Tool | Proficiency | Enables |
|---|---|---|
| Rusty tools | +1 | Basic early tasks; hits its cap quickly |
| Bronze axe | +2 | Carpentry worktable — crafts planks |
| Bronze hammer | +2 | Other workstations, including bronze nails |
| Bronze tier or better | +2 or more | Higher-tier materials and bigger output |
Give a zombie a bronze axe and, once its proficiency is sufficient, it will make planks at the carpentry worktable whenever materials are available. Swap the axe for a bronze hammer and the same zombie runs different stations instead. Because some recipes demand a minimum proficiency, better tools are the only way to widen what a zombie can craft.
One footnote: if you manually start a crafting job, an unequipped zombie can finish that single task — but it stops the moment the queue empties. Don't build your economy on that trick; equip properly instead.
Split your zombies into roles
No zombie is locked into one job — different tools unlock different work, so spread the labor across a whole production chain:
- Gatherers — loggers and miners with an axe and a pickaxe, parked next to trees or the quarry.
- Craftsmen — your highest-proficiency zombies, stationed at the anvil, fine woodworking bench, circular saw or stone cutter.
- Haulers — assigned to the supply post, moving raw materials out of crates and finished goods back to storage.
- Farmers — tending the vegetable garden, vineyard and hop fields; crop yield scales with proficiency.
A reliable loop: one zombie at the supply post feeding materials to a second zombie at a workstation, then hauling the output back to storage. Once that chain runs, it restocks itself.
Perks and organ upgrades
Every repetition of a task earns that zombie experience, which converts into perks — better, more efficient output over time. Because perk rolls differ, it pays to raise each zombie for a specific job instead of keeping them identical.
You can also upgrade the body directly. Place a zombie on the autopsy table, click its organs, and swap in better ones. Two quirks worth knowing: white and red skulls don't change a zombie's work efficiency, and while corruption is designed to influence skill growth, the proficiency granted by equipment is what actually decides whether a zombie can do a job at all.
More zombies: resurrection
Two free zombies are only the start. To manufacture more, invest in the Resurrection technology (anatomy and alchemy part of the tech tree) and build a resurrection room:
- In the morgue, move to the west (left) side and open the locked door into the Resurrection Room.
- Build the Resurrection Table inside, place a zombie on it, and interact with the body to fit its collar.
- Wait for Snake Day — an uncommon day full of lightning. On that day, interact with the room's central platform to channel electricity into the table and raise the zombie.
How to tell it's working
A correctly configured zombie sits at its station, pulls the materials it needs, and produces that station's output — planks, bronze nails, whatever the recipe is. If it just stands there, it either has the wrong tool or not enough proficiency for the recipe. Once production starts, every completed cycle feeds more experience into its perks.